

Installation advice
Dishwasher drain hose: installation checks
Route and secure the drain hose, check the sink trap connection and inspect the first pump-out. Use the appliance manual for permitted heights and lengths.
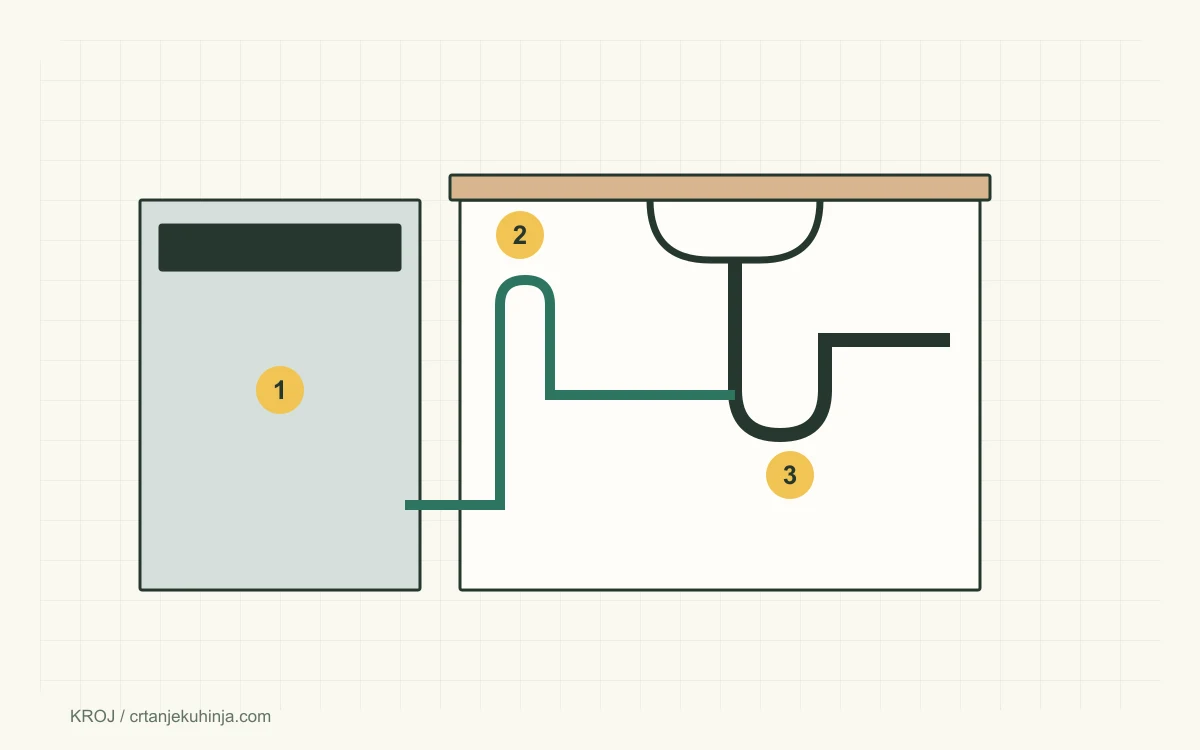
Prepare a dishwasher drain according to the installation instructions for the exact model, before pushing the appliance into its opening. Check the trap connection, hose route and access together. A hose that looked clear initially can be crushed during the final push.
Read the model-specific installation sheet
Copy the full model identifier from the appliance label and find its installation diagram. Check permitted connection height, hose routing, total length and extension requirements. The wall waste outlet, trap connection and highest point of the hose can be three different levels.
A single value such as “always install the drain 300 mm above the floor” cannot serve as universal dishwasher guidance. If the manual requires the hose to be raised and secured, follow that arrangement. Where local rules require an air gap, provide the specified arrangement; a high loop is not automatically a substitute. Bosch describes the basic trap connection and unobstructed hose route.
Keep the connection accessible
An adjacent sink cabinet is a common practical location where the appliance instructions and layout allow it. It lets you inspect the connection without removing the dishwasher. Avoid protruding connections inside the space needed for the appliance depth. Allow for the hose route when the appliance is withdrawn for service.
Position any side-panel opening away from structural supports, runners and other fittings. Remove sharp edges, protect the hose from abrasion and seal exposed chipboard using the appropriate material system. The opening must pass the largest component being threaded through it, not only the hose diameter.
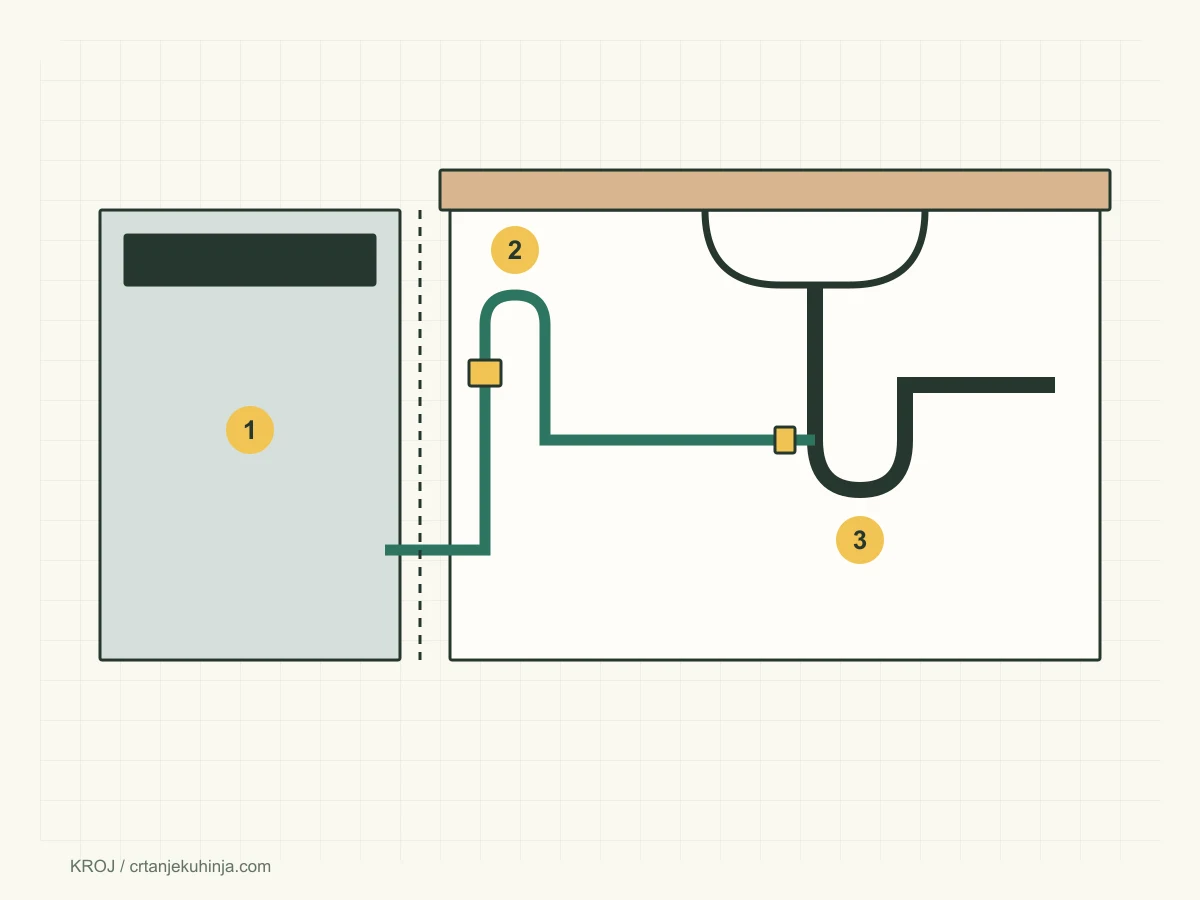
Routing concept with no universal heights: 1 dishwasher, 2 hose routing and securing to the appliance instructions, 3 trap connection; the joint remains accessible in the adjacent cabinet.
Check the trap spigot before connecting
Use a spigot intended for an appliance hose. On a new trap, check for a factory blanking membrane or cap and remove it as its instructions require. Push the hose on to the specified depth and secure it with the prescribed clamp. Tape or silicone does not replace a proper mechanical connection.
If the spigot does not match the hose, use an approved adapter or suitable trap. Check that the trap does not obstruct bins, drawers or valve access. Confirm that the sink drains properly before connecting the appliance.
Avoid crushing the hose during insertion
Route the hose without sharp bends, twists or tension. Arrange excess length in the permitted space according to the manual rather than packing it behind the appliance. Only use an extension where the manufacturer allows one, with the specified connection and within the permitted total length.
As the dishwasher is pushed in, a second person can observe the route from the adjacent cabinet without pulling the joints or putting hands in a pinch point. Finally check that legs, brackets and plinth do not press on the hose. See the kitchen service layout guide for wider preparation, then confirm final dimensions against your own appliance.
Test filling and draining before closing the plinth
Once water supply, drainage and electrical connection are correctly completed, perform the test specified in the appliance instructions. Inspect accessible connections during filling and especially pump-out. Dry paper below an accessible joint can help reveal drips, but does not replace inspection.
Check that water does not escape at the trap and that the machine completes draining without an error. Stop the test if it leaks and correct the cause following the instructions. Close the plinth after the test and after confirming unobstructed door movement. Changes to fixed plumbing or electrical installations belong with the appropriate qualified trade.
Related installation advice
Continue with Gola profile and a 772 mm cabinet: fitting checks and Kitchen cabinet quality: what to check.
Prepare cabinet and service positions in the kitchen planner, then confirm the connections on site.
Frequently asked questions
How high should a dishwasher drain connection be?
Use the range allowed by the model's installation sheet. Check connection height, any required raised hose route and total hose length separately.
Why will a newly installed dishwasher not drain?
Possible installation causes include a blanked trap spigot or a crushed hose. Isolate the appliance as instructed and check the installation; its error code may require service diagnosis.
Can the connection sit behind the dishwasher?
Its position must comply with the manual and available recess depth. An accessible connection in the adjacent cabinet often simplifies inspection and servicing where that route is permitted.