

Installation advice
Ceiling-height kitchens: installation problems
Check uneven ceilings, cabinet lifting clearance, top fillers, door movement and appliance ventilation before making a ceiling-height kitchen.
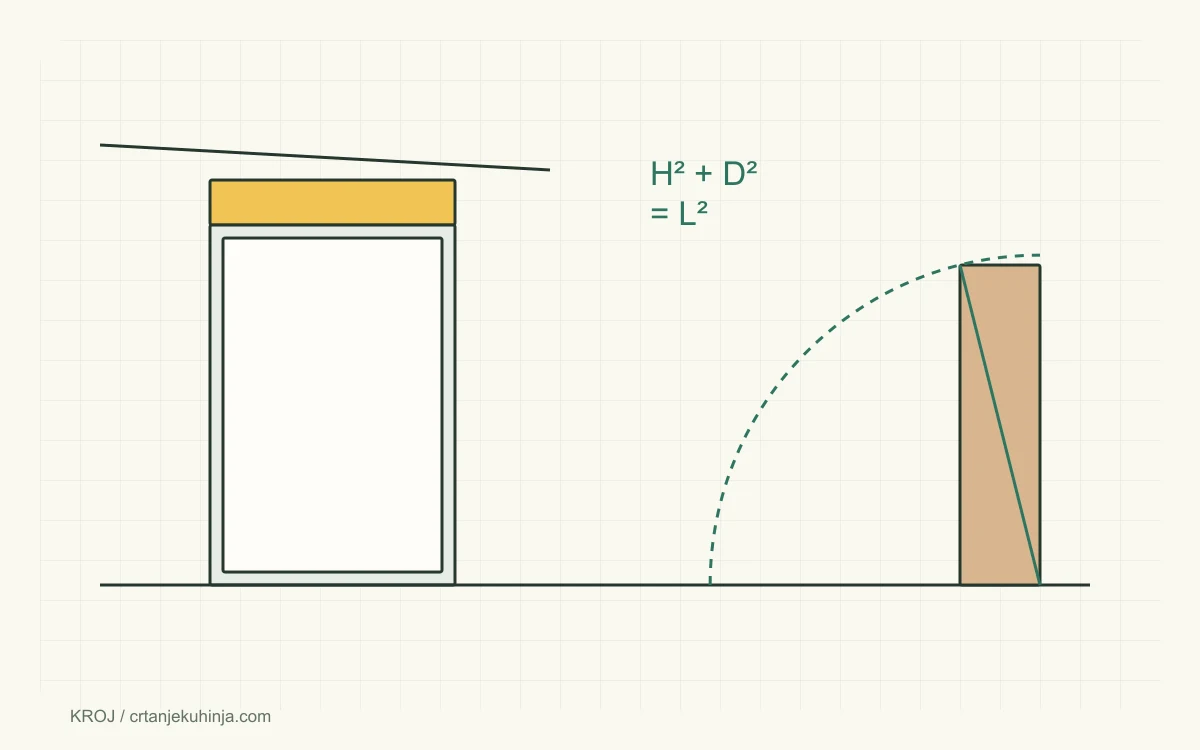
A ceiling-height kitchen needs a planned method for delivery, lifting, fixing and closing the top gap. One room-height measurement in a corner is not enough for manufacture. A top filler often accommodates the difference between level cabinets and the actual ceiling.
Find the lowest point along the whole run
Measure from the finished floor at several positions along the planned front and rear cabinet edges. Use a laser to check floor and ceiling slopes. Record beams, service boxing, vents, light fittings and cornices. The lowest obstruction along the installation route may matter more than the height above the final position.
Check access through doors, corridors, stairs or a lift, and space for assembly. The measuring guide helps record the room; add ceiling measurements to the project before ordering panels.
Allow enough space to stand the cabinet up
When a rectangular cabinet rotates from lying down in the plane of height H and depth D, the required vertical envelope reaches the diagonal of that rectangle. An idealised 2400 × 600 mm cabinet has a diagonal of approximately 2474 mm. A 2450 mm ceiling therefore prevents that lifting method, even though the upright 2400 mm cabinet appears to fit.
This calculation is not an installation allowance. Actual legs, protruding fittings, packing, uneven surfaces and handling change the space required. Rotation in a different plane involves different dimensions. Solutions may include upright assembly using a planned procedure, a different leg-fitting sequence or a multi-part cabinet. Choose according to construction and access.
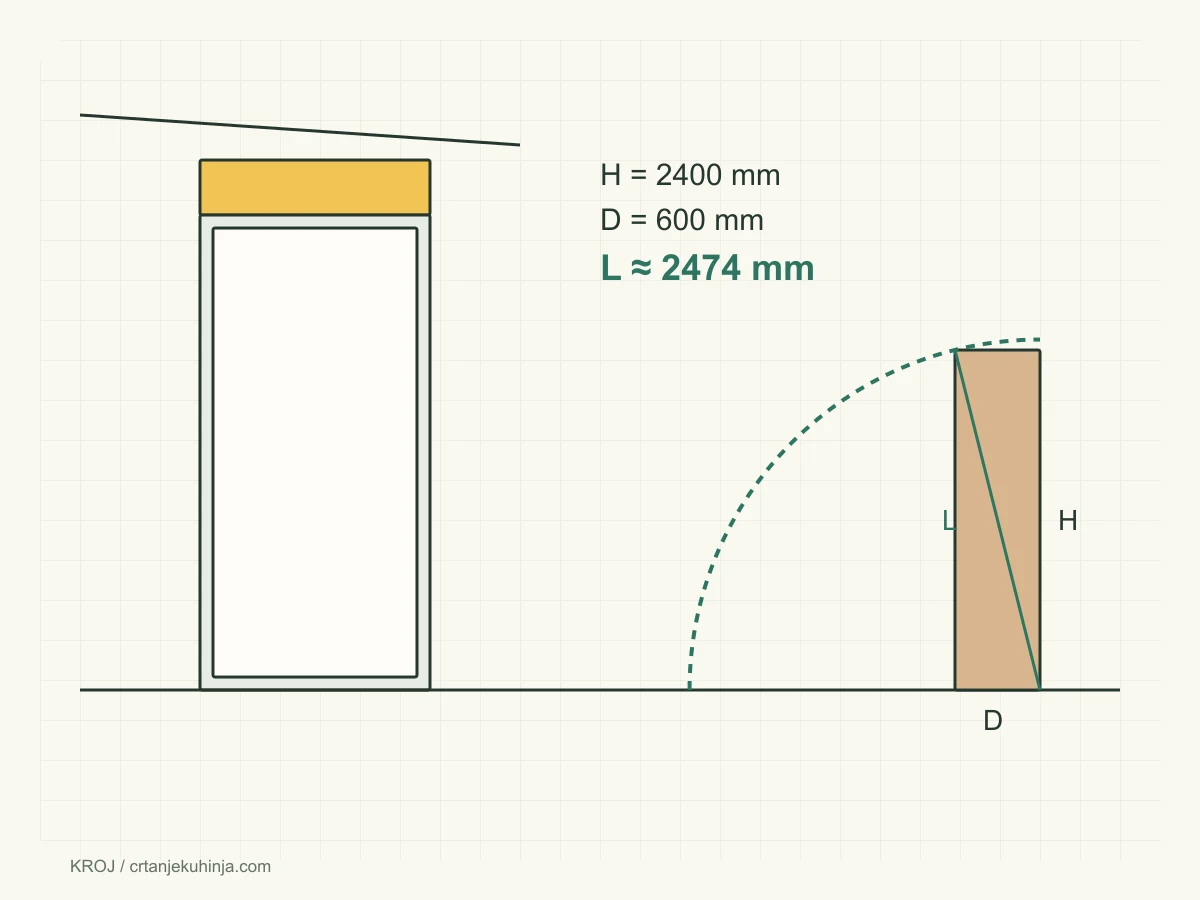
Two separate checks: a top filler follows an uneven ceiling; rotating a 2400 × 600 mm cabinet in the illustrated plane gives a geometric diagonal of about 2474 mm, before installation allowance.
A separate top unit can simplify installation
A tall lower cabinet with a separate top unit is often easier to deliver and install than one very tall assembly. Coordinate the split with doors, appliances and structural panels. The top unit needs designed support and connections; it must not bear on a decorative front or thin filler.
For wall units, check the wall, rail position, hangers and access for adjustment. Connecting neighbouring cabinets does not replace specified wall fixing. IKEA's kitchen installation guide also starts with assessing the wall and suitable support. Select the actual fixings for the real substrate and assembly.
Scribe the filler after levelling
Position, level and secure the cabinets first. Then measure the remaining gap and scribe the ceiling profile onto the filler. Choose a fixing method that maintains any required service access. Filler size must allow installation and adjustment as well as achieve the desired appearance.
Trial-open every upper front. A lift-up fitting may require space above the cabinet, while a hinged door can catch an uneven ceiling, cornice or light. Check the entire movement path rather than only the closed position. Use an opening restrictor only where the selected system supports it and the remaining access is suitable.
Preserve ventilation and service access
Closing the gap to the ceiling must not block the inlet and outlet airflow required by an integrated refrigerator or other appliance. Check the necessary free area and air route in its installation sheet. Random holes in a filler do not establish adequate ventilation. Preserve access to lighting connections, power supplies and serviceable parts.
Store heavy items according to permitted loads and accessibility, and plan stable access to high shelves. Do not stand on a worktop or drawer to reach the top. Before handover, check fronts, fixings, vents and removable service fillers. Develop the arrangement in the kitchen planner before manufacture.
Related installation advice
Continue with Kitchen cabinet quality: what to check and Corner kitchen installation: joining cabinet runs.
Frequently asked questions
How much gap should be left below the ceiling?
It depends on unevenness, lifting method, hangers, door fittings and filler construction. Establish the required gap before manufacture; one dimension cannot cover every assembly.
Can a cabinet equal the room height?
Matching dimensions alone is insufficient. The cabinet must be delivered, assembled or lifted, secured and adjusted without hitting the ceiling.
Can a top filler close the space above a fridge?
Only while maintaining the ventilation required by that model and the necessary service access. Follow the appliance installation diagram.